Showing posts with label Tips. Show all posts

11 April 2024

Choosing DSLR/Mirrorless Camera Lenses and Their Care, By Arbain Rambey

This article regarding tips for choosing camera lenses was compiled from Arbain Rambey's long-standing cult. We have deliberately summarized it into an article that is easy to read and easy to understand. Copyright remains the property of Kultwit. Please follow his Twitter account at @arbainrambey. Hope it is useful.

The basic quality of a photo is determined by the quality of the camera, lens, and firmware. Lens quality is important, but it still depends on two other qualities. The quality of the lens is seen from the sharpness of the image and the quality of the colors produced. The quality of the lens must also be seen from the durability of the manufacturer, rubber, etc. It's best to buy lenses of the best quality, but if you use cheap lenses, don't worry too much because other qualities are involved.


Ideal Focal Lenth, Wide Lens or Telephoto Lens?

When choosing a camera lens, you need to pay attention to the following things. A wide lens doesn't have to be for wide shots. A telephoto lens doesn't have to be for long shots either. A telephoto lens brings what is far away closer while a wide lens moves away what is near, this is called the lens distortion effect or compaction.


The photo above shows two bottles, taken using three types of lenses. The first photo is an 18mm wide lens which gives a close-up effect. The second photo is a normal 34mm lens showing the actual distance conditions. Finally, the third photo was taken using a 55mm telephoto lens, making the two bottles appear closer together.

So having a telephoto lens or wide lens is not just to get a wide and far angle, but also to get the effects of distortion or perspective.

Wide lenses are unnatural for human faces. Unless you really want to make his face look funny and strange. In general, photographing humans should use the 70-200 mm range. Too short a focal (wide lens) causes distortion, too long (telephoto) causes compaction. Facial distortion due to a wide lens that is too short makes the face convex. Meanwhile, using a telephoto that is too long to photograph the face makes the ears appear to be on the same level as the nose (flat/flat face).

Large aperture lenses (1.8 or even 1) are comfortable for shooting because they are bright. But it is rarely used at the largest aperture because the results can be soft / not sharp. Ideally, a lens has a range of 16-35mm, 24-70mm and 70-200mm (135 format) or 7-14mm, 12-60mm and 50-200mm (Fourthird). Why are there so many lens choices? Because there are so many human tastes. There is never an absolute choice in buying lenses.

There is no lens brand whose products all stand out. Each brand definitely has superior products and also products that are less popular. For example, on Olympus, the superior lenses are 35-100mm/f2 and 7-14mm, on Canon it is 24-70mm/2.8 L.

The third party lenses currently available are of very good quality. Some types even have quality above the lenses from camera brands. But still, "price never lies" is the benchmark for buying quality lenses.

Please remember that the technical quality of a photo can be improved by post processing, for example using Adobe Photoshop, Gimp, etc. software. So if you already have any lenses, just use them. Don't use too many types of lenses so that you can get a "touch" of them, memorize their properties and understand their effects.


Camera Lens Accessories

Using the right camera lens is 50 percent of shooting. Wearing accessories such as lens hoods is an option only. The benefits vs. hassle are sometimes not worth it. But if you want to be safe, wear a lens hood.

Meanwhile, filters such as UV can also protect. But sometimes it reflects light backward when photographing sunrise/sunset. Even the best lenses sometimes need filters because there is always a special need for anything. Polarizing capability is not included in the lens function because it reduces lighting when it is not needed.


Choosing And Purchasing Lenses

The number of types of lenses a photographer must have is unlimited. So buy only what you need. Buy the most expensive lenses you can afford. Lenses can be used as an investment because the price is stable. Meanwhile, camera body prices tend to continue to fall. Choosing a lens has its standards, but breaking these standards sometimes produces photos that are actually better.

There are photos that require the quality of a fixed lens, and there are photos that require the reaction speed of a zoom lens. Between zoom and fixed lenses, the fixed ones are better and sharper. But if you use a handheld outdoors, normal eyes can't tell the difference. In general, zoom lenses are more practical with satisfactory results. Ask yourself, is it better to get 100 class photos but only 3 than getting 100 photos but only 90 classes? If you are still confused about buying a fixed or zoom lens, the answer is: Buy a Zoom one! Fixed lenses are only for people who know they need fixed lenses.

Another example of a cheaper fisheye lens is that it doesn't curve because the curve is actually a defect. But that's also a choice! Easy guide to buying lenses: go to a photo community, then look at what your friends are using. Don't be afraid of making a mistake when buying lenses. As long as you buy a well-known brand, and there are many of them, it's safe.

Do you need to wear lenses with a stabilizer? If you have more money, that's good too. Those lenses are more expensive. The price of used lenses can never be predicted because they contain trends and interests. What is certain is that the price of used lenses is stable.

Also pay attention to the crop-factor sensor, making the focal length of a lens seem to be elongated because the coverage area is reduced (as if it were telephoto). If it says a crop factor of 1.3x, that means a 30mm lens on Full Frame is like 1.3×30 or 40 mm on that camera. If on Micro Four Third which has a 2x crop-factor, then the 30mm lens on Full Frame becomes 60mm.


Lens Care


After choosing and buying, don't forget to take care of it. Here are some simple tips for caring for camera lenses, both DSLR and Mirrorless:

Quality lenses can be used for up to 20 years. A good body is only 6 years old
Keep your lenses away from extreme temperatures, and extreme temperature changes.
Don't knock the lens. Its accuracy will be damaged because it is a fragile item. There are many types of errors in modern lenses because they have complicated electronics. At Canon, a very mysterious error is called error 99.
When climbing a mountain, to avoid fogging up your lenses, don't wear them with your clothes.
In work that requires high-frequency shooting: for example, journalists covering natural disasters, the fewer lenses they carry, the better.
Beginner photos are often not sharp because the surface of the lens tends to become full of oil from being touched. So always clean!
How many times can a DSLR lens be removed without the mount coming loose? I don't know... some have had no problems since 1990
So, hopefully it's useful. Like if you like it, share with friends if it's useful.

08 October 2012

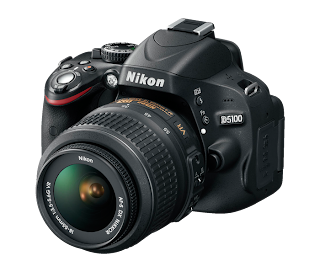
Load Picture Control on the NIKON d5100


Yesterday my friend asked me how to add a Picture Control in the Nikon D5100 camera, he's trying to add PICCON but it still does not work .

And this is the advice I give to my friends, you can also try it if one day you find the same problem .


13 January 2012

10 photography tips using mobile phones


Phoneography or photographed using a mobile phone has become a trend today. Wherever you go, you can easily capture every moment through the camera phone. Although only using a camera phone but there are some important things you need to know so they can create a classy photos like a professional photographer. Please refer to the 10 tips for mobile photography this:


31 October 2011

Lightroom Tips

I'm going to share with you 5 tips about Lightroom that I feel you must know to improve your image workflow and also your editing capabilities. These are tips that I have accumulated over the couple of years that I have been using Lightroom and they help me tremendously. So, without further delay, let's get to it!

1. Control Your Use of the Clarity Slider

The clarity slider can really make the details in an image stand out and also help out with inherent blur from the camera. What the clarity slider does is look for contrast in the middle of the tonal range and boost the contrast. In images with a lot of detail this can really make a huge difference. I usually set mine to +30 for starters and then gauge it from there. Now, there are times when you will not want to bump the clarity slider up because it can counterproductive. If you are editing a portrait, you will more than likely not want to bump your clarity slider up. As we know, every person has pores and those pores just happen to be in the middle to upper tonal range, which the clarity slider affects. When you are trying to get nice, smooth skin, you should try backing off of the clarity slider and seeing what it does to the skin. I usually start with -15 and make changes from there. The good thing is that you will not lose detail overall in the image, unless you make a dramatic adjustment, but you will start to see the skin smooth out quite nicely. With a few more adjustments, you will have some really smooth skin that look very pleasing. This brings us to our next tip..

01 October 2011

Food Photography

If you want to take some high quality food photographs for your business, or you just want some pics for your blog, here are some tips to help you get better food photos.

Style the food

This may seem like a bit much, but arranging your food carefully can make a dramatic difference to your food photographs. On professional food photography shoots a food stylist will often be employed just to get the food looking at its best. And many parts of the food may not even be real!

29 September 2011

Photojournalism

Photojournalism can fall under all subjects of photography but the image needs to be news worthy to end up being published.

There are two types of photojournalism :
The first type is where an image is used to illustrate a story. Many feature journalists work closely with photographers and commission them to produce images that will be published with their articles. There is no limit to how many images can be used. This is usually the photo editors decision.

27 September 2011

Marketing Your Photography

Selling photographs online has become big business in recent years... digital SLRs keep getting cheaper and the images they produce keep getting better. It seems everyone on the planet must own a camera by now. Given the recurring financial crises of the last few years, it's no surprise that more and more camera owners are looking to sell photography online for some extra money.

For professional photographers trying to make a living selling photography online all this extra competition from the hobbyists has made life pretty tough. Hundreds of websites have sprung up offering photographers the ability to give their work away for nothing more than small change and the thrill of making a sale. The market has been flooded with cheap images and many photo buyers have come to view stock photography as just another commodity to be sourced at the lowest possible price.

16 September 2011

How to make light graffiti

Hello, good morning guys, this morning I will try to share about how to make light graffiti.


There are 3 things that need to be prepared to make light graffiti:

1. Camera (preferably SLR / DSLR to be more flexible shutter speed settings)
2. Tripod / or any object that can keep the camera steady
3. Light source

13 September 2011

Mini studio made from cardboard

In this internet era, many people do business via the internet, the term cool online store. The procedure is quite simple and practical. Live display photos / drawings and written description of the product .But many do not show pictures of its products, or already displaying photos but the pictures are not interesting to look at even tend to random origin.

For that I tried sharing about artificial mini studio made ​​of cardboard used. With this mini studio, the resulting image will be better and worth a look. However, the mini studio is devoted to products that are not too large because it adjusts to the dimensions of the box itself.

12 September 2011

How to Shoot Wildlife Photography From a Vehicle

In many cases, a vehicle can gain a closer approach to a wild animal than a person can on foot. For example, most wildlife in national parks have grown accustomed to vehicles, and they know there's no threat.
 
Shooting from a vehicle can be done using a stable platform that attaches firmly to the driver's door when the window is rolled down. (These door mounts are available through various sources.) 

09 September 2011

Clothing for underwater models


Clothing (or lack thereof) is an integral part of a successful underwater shoot. It depends entirely on your aim or idea but generally try to use clothes that are loose or slightly too big. This allows them to move around underwater and adds a sense of movement and really accentuates that the shoot was taken underwater. An easy way to really emphasize the underwater element of the shoot is to use fabric as a “streamer.”

07 September 2011

Solarization in Dark Room

There are two kinds of solarization solarization on photo paper and on film. The second principle is the same solarization, ie expose-expose-develop-develop. Exposé is the process of shooting first or irradiation at the time of printing. Film or photo paper must terexpose image was developed in order to arise. At develop the paper / film is still sensitive to light, if the paper / film that has terdevelop expose us again with some more light and was developed whose names will appear the effect of solarization.
Solarization can not be done if the paper / film is difixer, because the paper / film is no longer light sensitive.

05 September 2011

Exposure value

In photography, exposure value (EV) denotes all combinations of a camera's shutter speed and relative aperture that give the same exposure. In an attempt to simplify choosing among combinations of equivalent camera settings, the concept was developed by the German shutter manufacturer Friedrich Deckel (de) in the 1950s (Ray 2000, 318). Exposure value also is used to indicate an interval on the photographic exposure scale, with 1 EV corresponding to a standard power-of-2 exposure step, commonly referred to as a stop.

26 August 2011

Taking photos of the show on stage

Taking photos of the show on stage is a unique branch of photography. Knowledge of photography is not enough to do lunch. In addition to need the experience of shooting-shooting earlier, stage photography also need "local experience".

Local experience in question is the understanding of the scenes that will be photographed. In a theater for example, a photographer needs to get a "key scenes", which is a photograph that could represent the overall performance. Here, time or when the camera take a shot is crucial. Two scenes are disputing a second time could be very different appearance.

25 August 2011

Cave explorer

Photographing in the caves must be completely dry by hand. Tripod became obligatory to always be there, could also use a table or stool hard, but it's certainly difficult to enter the cave take the table. Using the manual mode is standard, but with knowledge of the standard specification manual cameras used logic can be run again. Tool of the additional lighting besides the flash and boom is needed. Then the tape measure or rope with the right size (5 feet, 3 meters and 1 meter).
Once we find an object, determine exactly where the camera position will be to take the image composition. Attach a sturdy tripod and make sure it is. Do not shake or unbalanced.

24 August 2011

Tilt Shift Lens Not Just For Architecture Photos

I want to try to explore and prove that the tilt-shift is not just for architectural photos just using a large format camera but a 35mm SLR or DSLR users can also use it for images other than photos of architecture. Possible for professional photographers already using the camera view to foto2 their product is not new anymore, but the camera view once its use is very limited (ie in the studio only). they do not mind carrying a camera view for the photo session at the site. And limited funds that made me choose a lens which I will use in this article.

23 August 2011

Wedding photography

Wedding photography is the photography of activities relating to weddings. It encompasses photographs of the couple before marriage (for announcements, portrait displays, or thank you cards) as well as coverage of the wedding and reception (sometimes referred to as the wedding breakfast in non-US countries). It is a major commercial endeavor that supports the bulk of the efforts for many photography studios or independent photographers.

Like the technology of photography itself, the practice of wedding photography has evolved and grown since the invention of the photographic art form in 1826 by Joseph Nicéphore Niépce.In fact, an early photograph, recorded some 14 years after the fact, may be a recreation for the camera of the 1840 wedding of Queen Victoria to Prince Albert. However, in the early days of photography, most couples of more humble means did not hire a photographer to record the actual wedding itself.